1/18/2023

Strelets-R's Crusaders transport box

I wanted some non-fighting miniatures for my skirmishers and adventures as well as some wagons to either escort or rob them, so I found this box particularly interesting and useful.

One thing I like about these types of boxes from Strelets is that none of the miniatures are repeated; there is only one pose per model. On the other hand, something I didn't like was having to glue all the parts of the carts. Not having to build or glue a kit is one of the reasons why I like 1/72 scale so much.

The sculpting is a bit crude in my opinion, but the poses are very original. I especially like the guy picking his nose, but also the man with a boy on his shoulders or the wounded and dead people, who are very useful and rare to see.

First the wagons and mules:

The bases of the mules got a bit of frost from the matt varnish

 Second the people:

And finally the dead:

1/15/2023

Vallejo Xpress Color

They arrived to town and I took the plunge and got them as a late Xmas present. I bought all the colours available, 20 for 60 €. 


Things I don't like from them:

-They only have two browns, one for leather and another for wood, and I missed at least a beige or a light brown; I also missed a medium grey. Moreover, the their black colour, Black Lotus, has a bluish finish I don't quite like much. 

-The paint is a bit reactive and when you varnish the miniature some colour is lost, but I've read somewhere that can be solved by letting them dry overnight, I'll try it next time. 

-It does bubbles and you have to be careful not to let them dry.

-The new bottles are thinner than original ones and it's difficult to squeeze the right amount of paint out of them. If you are not careful, you'll get more than you need.

However, believe or not, I'm quite excited about them as it takes me three times more to paint a miniature in the traditional manner than with Xpress colors and getting similar results. They are also very cheap when compared to Contrasts from GW. The paints are easy to control and move on the surface and they allow thinning and mixing. Hues are rich and appropriate for Fantasy, Sci-fi and also ancient or Napoleonic armies. Actually, I'm waiting for the arrival of two DBA armies, Republican Romans and Gauls, and I think I'll paint them with these paints. I just wish there were also a range for muted colours for WWII and modern military uniforms and vehicles.

I tested these paints with 1/72 medieval peasants from Zvezda. They turned out very colourful, more than they should be, but I wanted to test all colours. The only ones I didn't dare to on them use were Deep Purple and Gloomy Violet as they were too much for these poor peasants.

As commented above, you can observe how some colour has gone after varnish, especially on reds, blues and greens. Metallic parts are Black Lotus with Natural Steel drybrushed on.


And here there is a comparison between a Zvezda peasant painted with Xpress on the left, and an Emhar Anglo-Saxon painted with base colour, wash and two lights. Although the figure on the right is not very good painted, you can see there is no big difference in the final result, especially if you look at them from distance.


1/05/2023

Rescue

All right, so I decided to go and try to rescue my missing soldier and play a Rescue mission. The prisoner is being held in a small secret base in the middle of a jungle. I recruited a seasoned soldier and equipped him and the rest of the squad with better weapons and armour. 

I start the mission splitting my squad into two teams and deploying them 10" away from the camp on top and left sides. After that, I roll to deploy in which building the prisoner is held. The blue tokens are Blips of possible enemies, the one in the building is where the prisoner is, and the orange die marks the turns.

The team at the top advances through the bushes and reveals a Blip wich turns into a Boss, a veteran Grey Alien.

The team shoots and wounds the boss, making him to take cover. Meanwhile, the other team approaches to the objective building.

The Alien boss moves out but it is fire in Overwatch and wounded again and he hides back behind the bushes. Some of my troops enter the building but it is empty! They liberate their comrade and take the opportunity to clean and loot the building. They get two victory points. Now a new Blip comes from the West.

On turn four two Blips of enemies emerge from the bottom right building. They are three regulars and two Aliens, one with automatic laser rifle. The trooper behind the white crates fires on Overwatch and wounds four of them with his SAW, making them run for cover and two panicking.

In the next turn the Aliens recover and kill the squaddie with the SAW. One Alien tries a Psi attack from the window but it fails.

My troops are trying to flee but more enemies exit the top left building. The leader fires and stops them for a moment.

One enemy soldier panics but the other two fire and kill the guy I was rescuing! Mission failed!

I rally one of my men from panic and then frantically exit the board with all of them on turn 8, so I would receive 2 VPs for finishing before turn 10 but as I failed the mission they are denied, and the only points I get are those two from looting the building. Also, I lost another man apart from the one I went to rescue.

I could not use my automatic missile launcher but neither the Alien Boss could do anything against me as it was suppressed the whole game waiting for some backup. My leader proved essential to help his soldiers pass all their morale tests. Regretfully, the guy I was rescuing got shot in the open and the misson was a failure. I lost 10 VPs and some Alien tech weapons I could not pick up.

1/01/2023

Assassination

It is new year and I have decided to leave Fantasy for a while and play some sci-fi with my long-forgotten 15mm miniatures and house rules I love to tinker with from time to time.

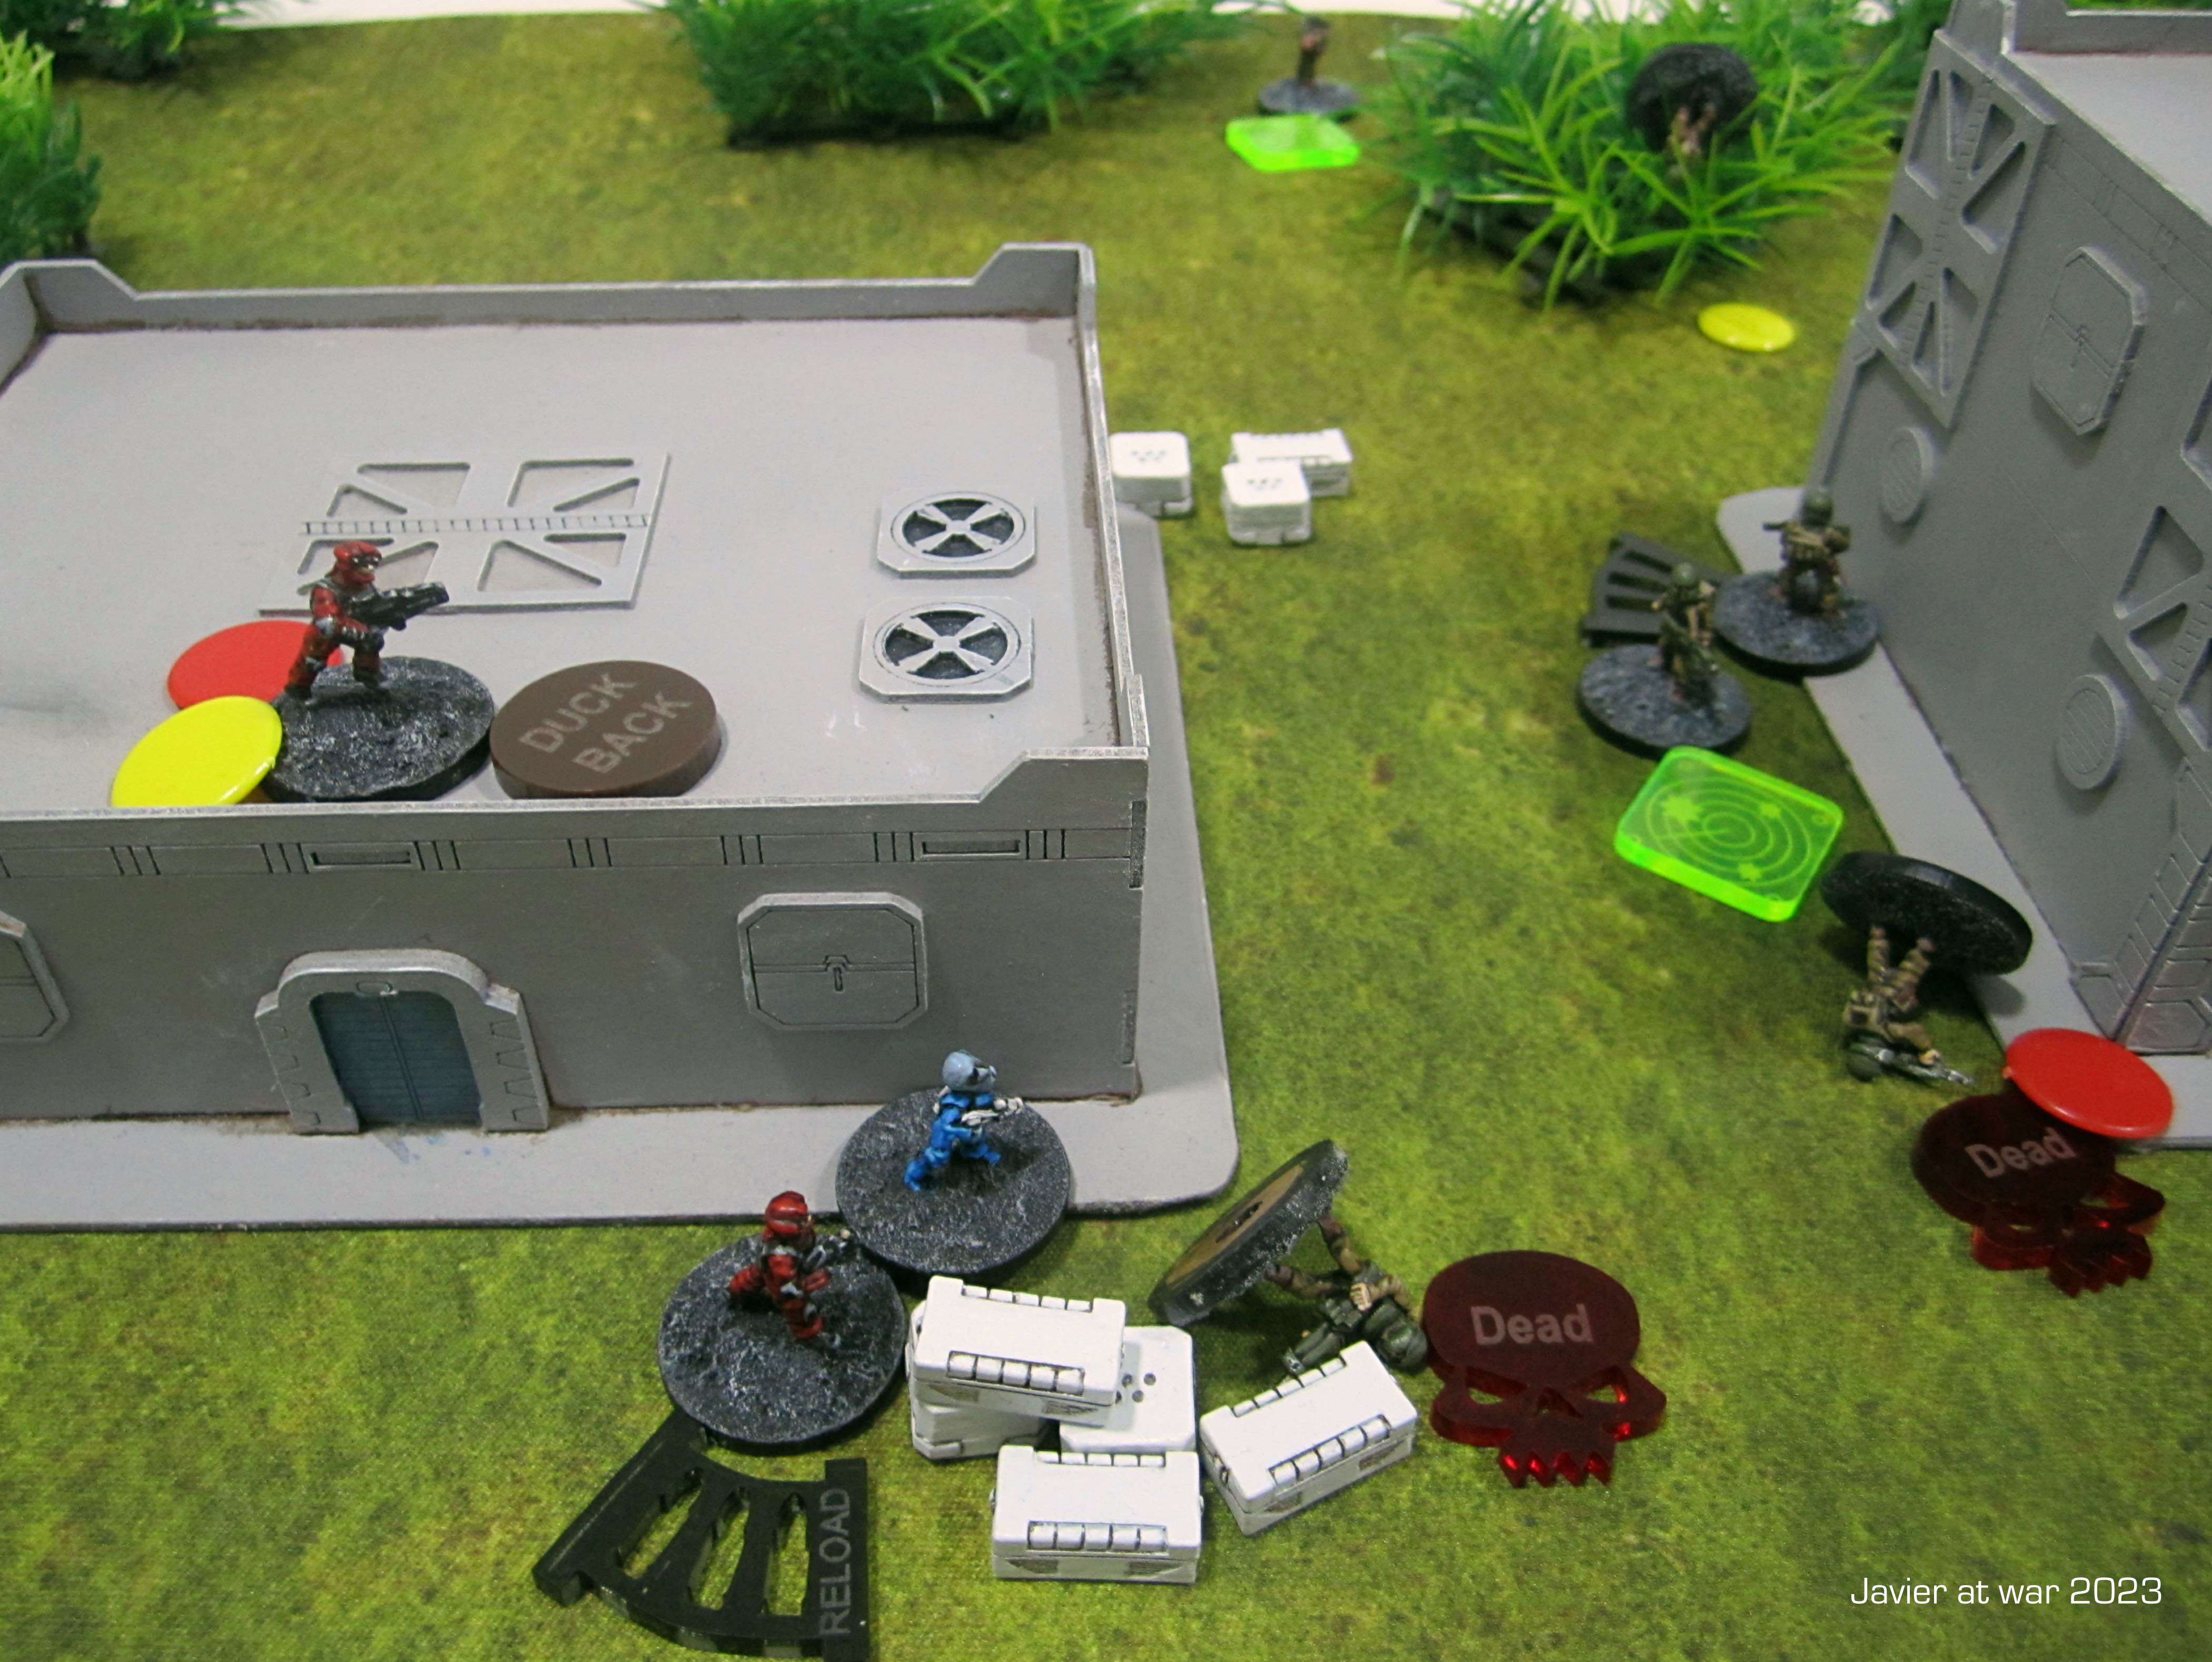
This mission is Assassination and the objective is well, to assassinate somebody, ahem. So my squad of six men, three regulars better equipped and armed than the other three who are new recruits. The target is in the small building with two bodyguard veterans armed with big pistol and assault rifle respectively. The big building is a Spawn Point (barracks) that generates yellow Blips once shooting starts.

There are two Blips of sentinels in the outside perimeter of the camp. I deploy wherever I want at 10" range and try to go stealth to avoid generating Blips so soon.

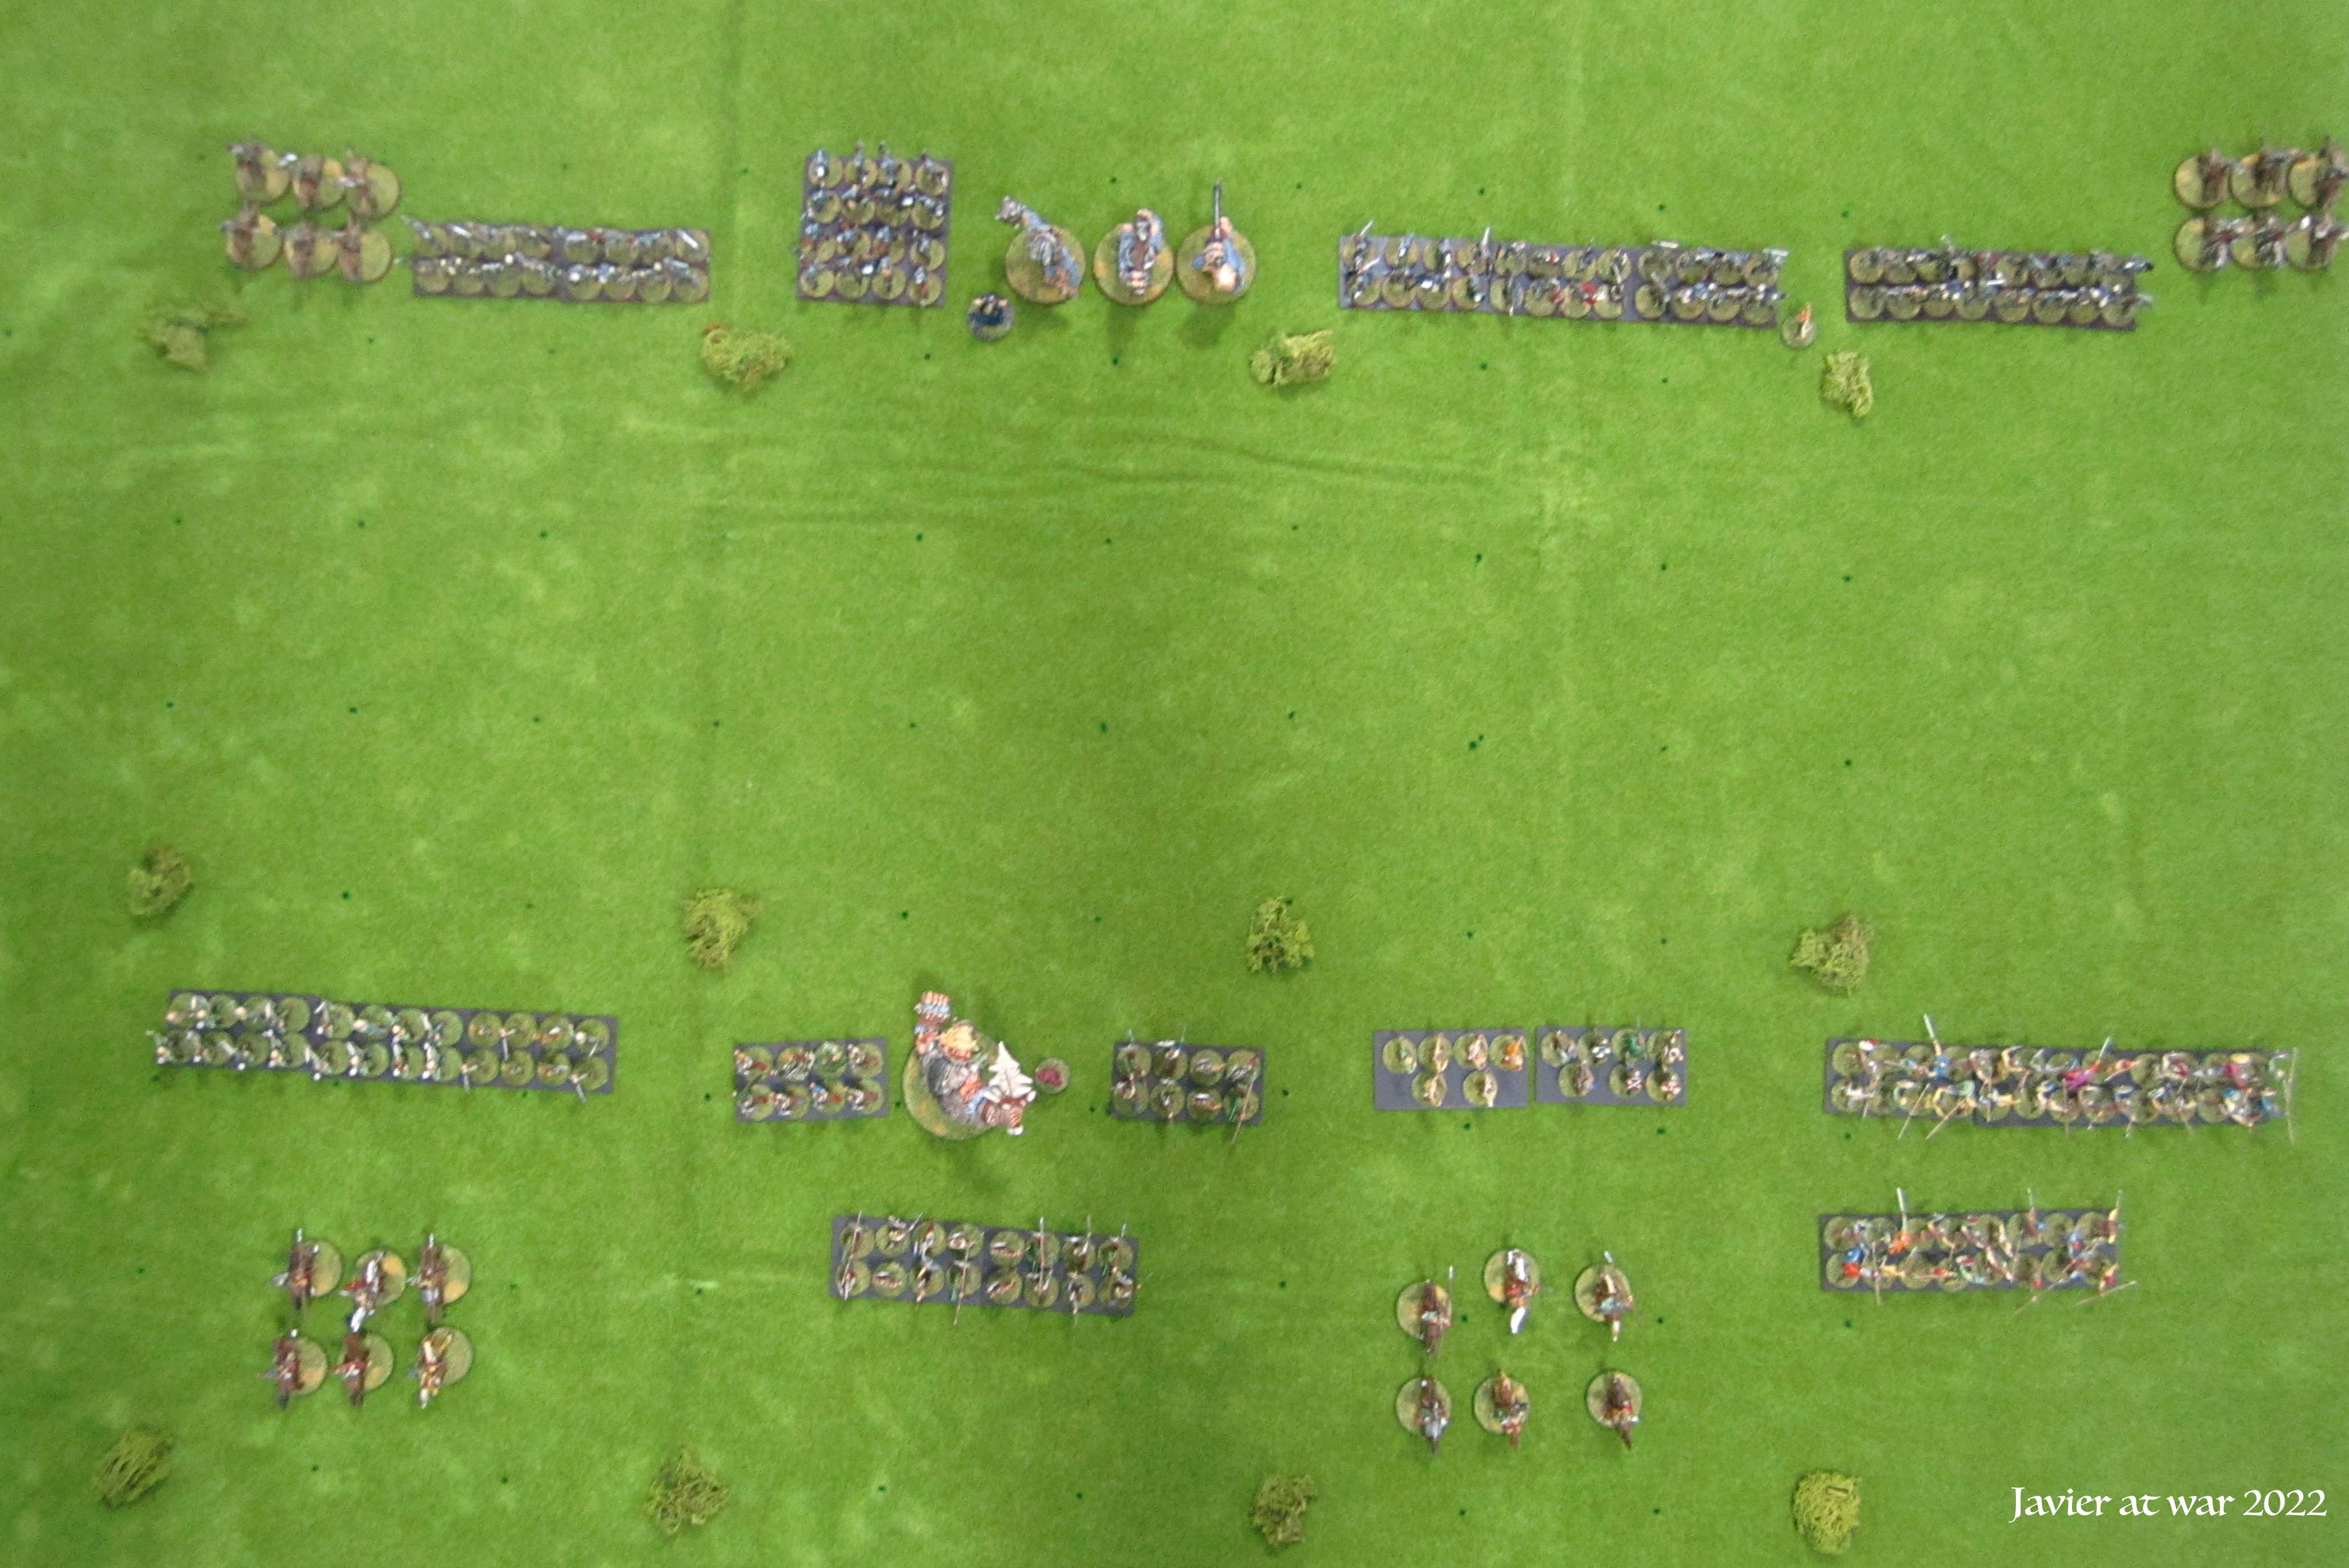
The board is a DBA 3.0 80 x 80 cm board. The yellow Blips are possible enemy forces and the orange D10 is marking turns. All missions work on a clock and player only receive Victory Points if done under 10 turns.

I deployed my squad South of the camp, behind the hills.

Player always moves first. I charge the only sentinel in hand-to-hand combat to avoid making noise, but he is tougher than expected and wounds one of my men, although he is finally put down.

The other half of the squad runs towards the objective while one man covers them in Overwatch from the ridge of the hill.

In the next turn I throw two HE hand grenades through the windows but only one goes off. The blast wounds the two bodyguards and lets everybody concussed and without activating this turn. The first Blip is generated in the barracks. The one already inside is only resolved and activates if any of my men enter in the building.

The generated Blip gets a "They are coming!" result which means next one gets +1 in the roll. Meanwhile, the Blip of sentinels moves down and is resolved by the squaddie in the hill on Overwatch. They are three regulars with rifles and one veteran sniper. He fires his SAW but only manages to kill one soldier, and then the rest fire and kill him. The SAW man did not kill many enemies but at least he stopped them before the could reach the corner and fire at his mates in the open.

 
Seeing enemies incoming I move back a bit and set most of my men on Overwatch while one of them fires twice inside the building and kills the VIP target. The new Blip generated in the barracks is one trooper who is instantly downed by one of my men with a grenade launcher. 
On the left, the sentinels pop out and the sniper in the hill is killed and a grunt in the corner wounded by opportunity fire.

The sentinels throw a hand grenade and hits and wounds one of my soldiers. The bodyguards heal themselves with their medkits but do not move.

Having successfully killed the VIP now I have to leave the battlefield as soon as possible, so two of my men run towards the nearest border while the rest covers them. They finish the rest of the sentinels with a well put round from the grenade launcher. My leader fires and hits nothing and gets out of ammo.

Before they all leave the board one bodyguard fires and wounds one of my men, but he is not killed and manages to flee (I did not stop to heal, reload or return fire). They all leave the battlefield on turn 6 so they get 5 Victory Points plus another 5 VPs for successfully acomplishing the mission. I could have looted down enemies and buildigs but I did not because that would have made me lose too many turns and VPs and also because there were active enemies in the area. 

I forgot to EVAC my man out of fight on the hill but I rolled on the recovery chart at the end of the game for curiosity and he got a result of "just another scar" and fully recovered from his wounds, so now he is prisoner and next time I may try to rescue him.

All in all, a short and sweet encounter, and happy with the outcome of the mission and how rules worked.

Happy New Year!


12/25/2022

The end

This is it, the end of the campaign, the final battle in which Eilif and his king Einar fight an all or nothing battle for survival against the Orcs.

For this battle Eilif has brought everything he could muster from his lands plus three units of Elves, one Mountain Giant and a wizard. The Orcs have also brought all his forces plus four units of big Orcs, three Trolls and two wizards.

I deployed first and then I rolled for the Orcs deployment. I got Penetrate Center, so the Orcs deployed in a very similar way to me, with the shock troops in the centre and cavalry in the wings.

Bottom left, the Elves and one cavalry unit, centre king Einar with his bodyguard (huscarles), the wizard and the Giant, on the right a unit of archers and Eilif' Rangers backed by another unit of cavalry, and finally four more units of Fyrd. In front of them the Orcs deployed as commented and with a unit of skirmishers up front.

Turn 1. Humans 2 - Orcs 6. Orcs don't activate. Humans advance and fire to the Goblin skirmishers. They cannot resist two units of Elves with long bows, one of Rangers and another of archers plus the wizard, and they are all eliminated.

Turn 2. Humans 2 - Orcs 5. Orcs activate first and move forward, then humans charge and the battle is joined.

The Elf archers make one unit of Orc cavalry flee the battlefield and kill a few Orcs on foot. In the centre, king Einar charges one Troll and suffers many casualties, the Giant goes for the Troll in the middle but the combat is inconclusive, the third Troll results wounded but most of the fyrd unit goes down in the process; The Trolls resisted quite well the melee because they had a spell of protection that the Wizard casted on them. Eilif and the archers don't charge but shoot and kill many Orcs. The right flank advances forward unchallenged.

 
Same moment from a different perspective. At the bottom you can see the Orc cavalry fleeing from the battle.

Turn 3. Humans 6 - Orcs 3. Humans don't activate and the rest of the Orcs charge and the humans received them in Shieldwall. The evil sorcerer casts a unit of Undead!


The Orc general is slained by the archers in melee as his units suffered many casualtiesfrom bow fire during the charge!

A general view of the massacre.

 The Orcs are already doomed and in the following turn they are finished. Einar charges and kills the wizard, making the Undead unit to disappear, the Giant kills the last Troll, the elves wipe out all the Orcs on the left flank, and the two units of cavalry finish the weakened units of Orcs.


A feast for the crows and new lands to colonise for  Einar and his people!

Happy Christmas!

12/18/2022

Giant hunt

After Eilif successfully returning to his king's court with Elf allies, he is commanded by his king to one final quest before the decisive battle king Einar is planning against the invading Orcs.

Eilif is sent to try to hire or recruit one of those legendary Mountain Giants to fight against the Trolls the Orcs are rallying against them. He is allowd to recruit some free men from his kingdom to help him on his quest.

So Eilif Rep 5, AC 4, armed with a Sword of Rage, his comrade Arne Rep 4, AC 4, Sword of Rage and short bow of Seeking, both riding horses and accompanied by two Rep 3 archers and three Rep 4 spearmen, set off on their final mission.

I'm playing a Contact Encounter in which I have to find the Mountain Giant who is being attacked by some Hill Giants in one of their usual territorial quarrels. Basically, I have to help and save him from his attackers.

At the top of the picture there is the Mountain Giant defending the pass to his valley and then four Hill Giants attacking them. One of them has already spotted Eilif and his men at the bottom of the picture.

Hill Giants activate first, the closest to the Mountain Giant attacks him and is smashed against the ground after a few pathetic efforts to win the melee. Other two Hill Giants are on their way while the last one charges Eilif.

This Giant doesn't reach Eilif's men who in their activation shoot arrows to no effect and then charge him.

Eilif and Arne have both extra melee dice for charging on horse and having Swords of Rage plus the numeric superiority. His recruited men weren't so lucky as they were all wiped off like insects.

Finally, it was the Mountain Giant's activation who moves forward looking for some trouble.

In the next turn he is simultaneously attacked by the last two Hill Giants. A fierce fight is ensued in which all the combatants lose some Rep but little else.

Eiflis hurries to help the Mountain Giant before it is too late. The archers can't make it this turn without horses.

There are a few more rounds of combat and the archers finally arrive and add their weight to the general melee. In the end, one Hill Giant is killed by Eilif and the other by the Mountain Giant whereas Arne barely survives with Rep 1 and one of the archers is crushed to death.

So that was all, a short and very fast game in which Einar managed to save the now grateful Giant, and so, bringing him to his side for his king. 

Next there will be a huge all-or-nothing battle deciding the future of Eilif's people as a conclusion of this campaign in which I am alternatively using one ruleset for skirmishes (Warrior Heroes Adventures in Talomir) and another for battles (heavily modified Great Hall Burning), both from Two Hour Wargames.


12/10/2022

1/72 Bloodletters

My son asked me to print him 20 Bloodletters in 1/72 scale but I doubt I ever see them fully painted. Anyway, I have to say they look really good and I am considering to print some other stuff for my self, like cave bears and wolves for my 1/72 Fantasy adventures. 

In my previous post you can see one of these ones next to a human. I think they turned out a bit big but I don't care much about it.

Half of them already based (I used 25mm Warlord round bases).


The other half already primed and waiting for my son to paint them.