Showing posts with label Nuts!. Show all posts

6/12/2022

Nuts! Banging away.

Yesterday we played the 16th scenario from the Nuts! supplement from Two Hour Wargames The Big Hurt which takes place in the Hürtgen Forest, on November 6th, 1944, Kommerscheidt, Germany.

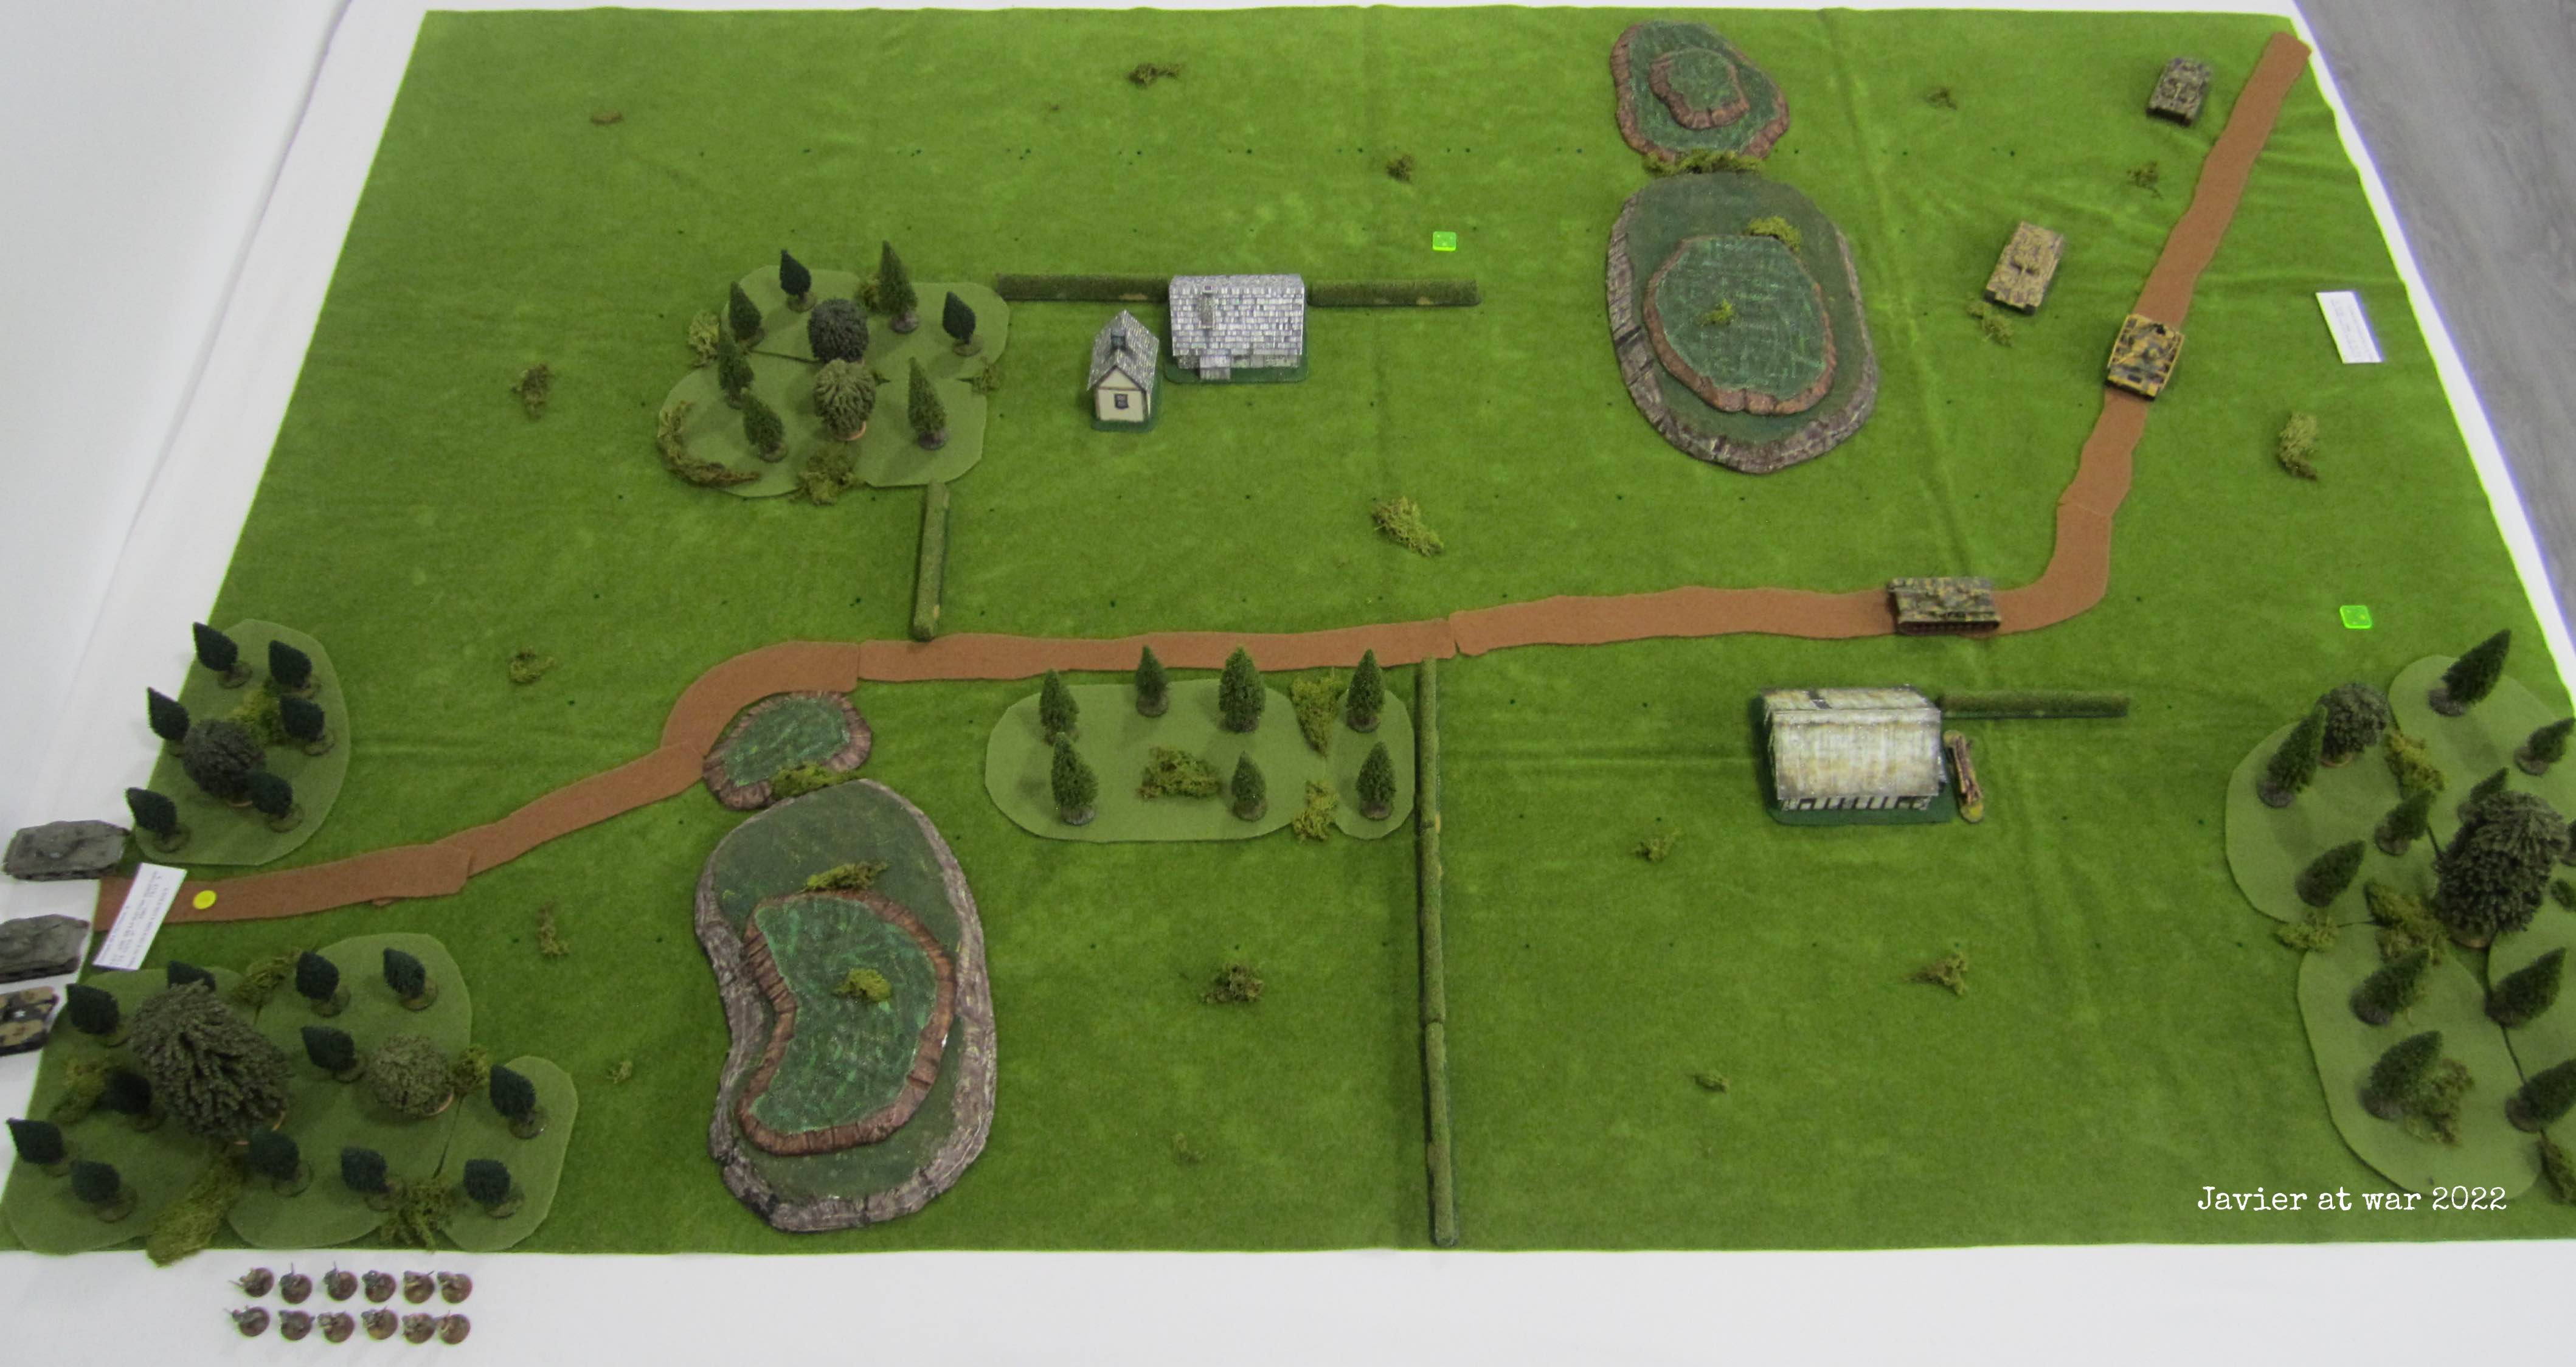
The Americans with one full infantry squad and three Shermans M4 must prevent German forces with two infantry squads, three Pz IV J and one Panther putting one tank in the yellow dot you can see in the picture below, where the Americans deploy, before turn 10. Both sides can have reinforcements.

Americans start on bottom left corner and Germans on top right corner. The two yellowy counters are German PEFs representing the two infantry squads.

One of the Shermans started in sight of the panzer IV on the road. Germans won activation, fired, hit and destroyed the Sherman (Shermans and their crews were worse than Germans'). Then, on the Americans activation the M10 (proxying as a Sherman 76mm) got hull down behind the wedge, but again the Germans won the In Sight and the same Panzer fired, hit the turret and penetrated it, disabling the tank and forcing the crew to bail out. I should have been more cautious with those Shermans.

My last Sherman was in hull down behind the crest of the hill and partially hidden behind the forest next to the road,  but as soon as another Pz IV got sight of if from the other hill, again he reacted first, fired, hit and destroyed my last tank! Now I only had infantry with one bazooka to stop those panzers.

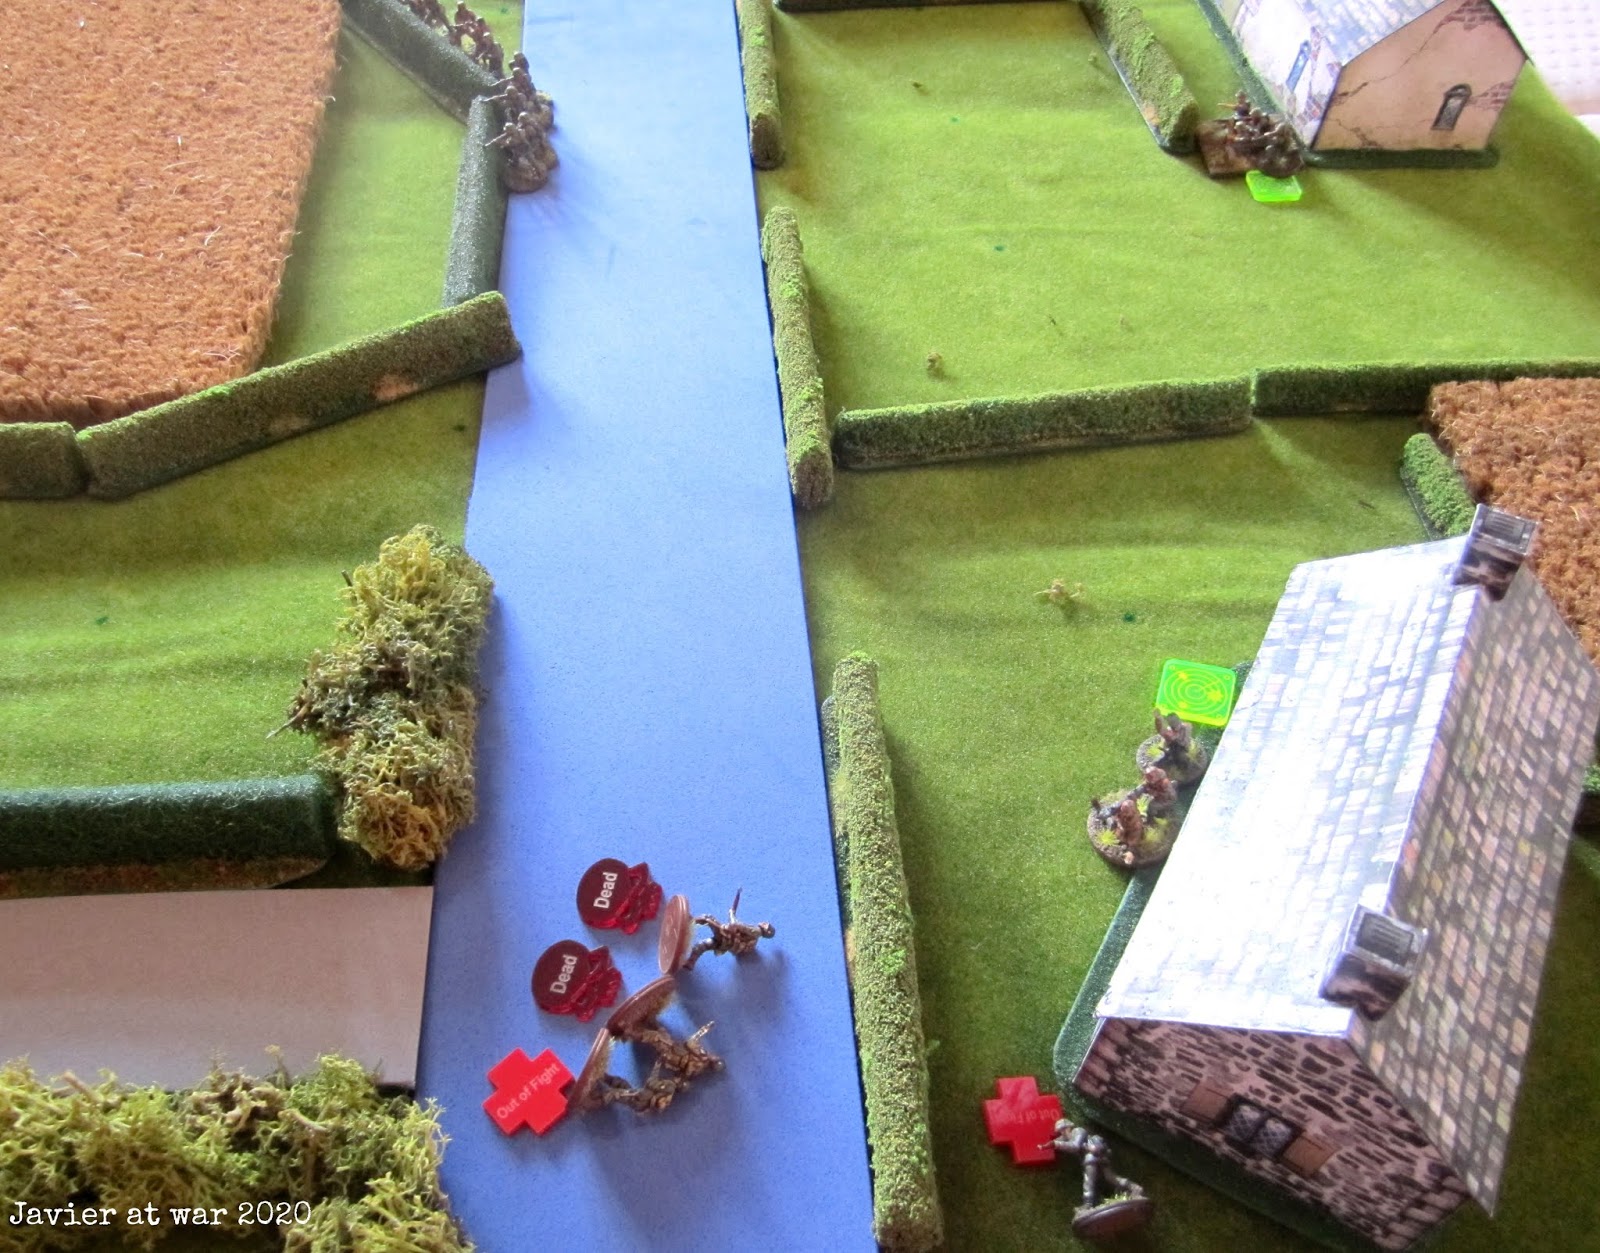
I sent half of my squad with the NCO jr. and bazooka to the forest and houses in the centre, and the other half with the NCO and the BAR to the forest next to the road. But half of a squad was no match for a full squad of German veterans and most of them fell down in the firefight. The pinned down survivors were then charged and finished in hand-to-hand combat. Ouch!

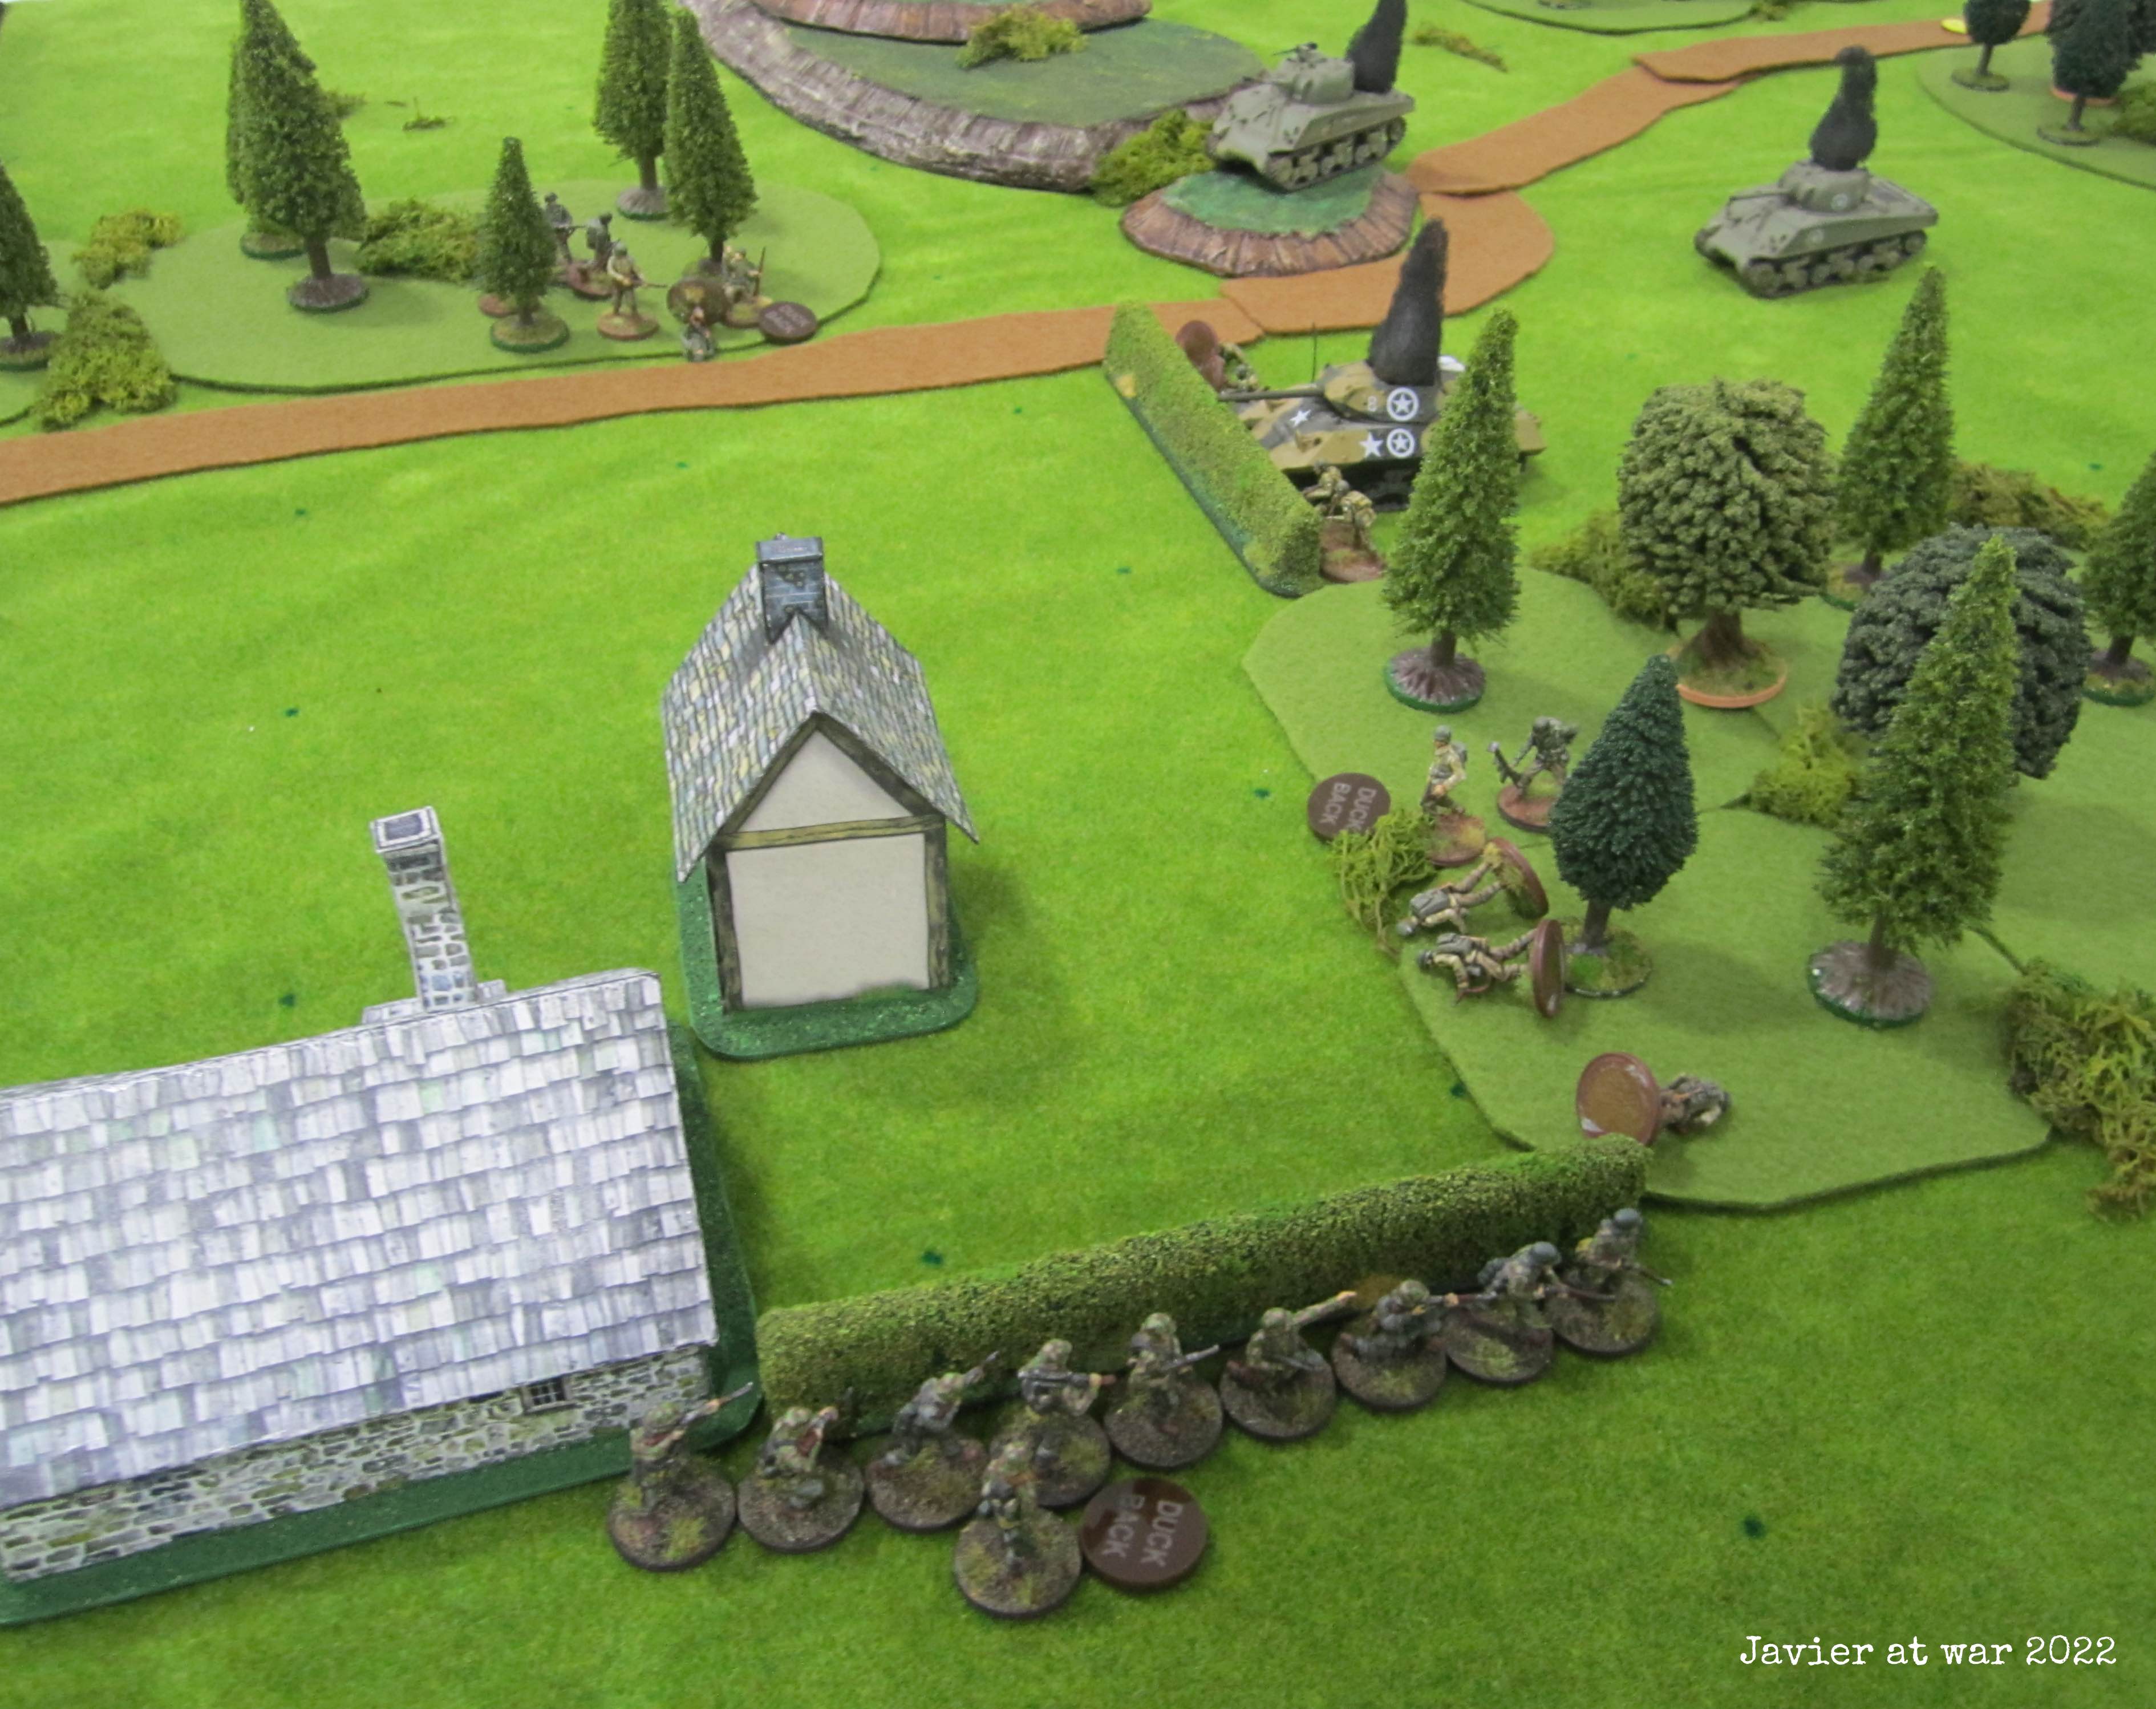
On the forest on the right things were better as my NCO had Steely Eyes and Rep 5 and could make his section to react first and finish most of the second German squad with the BAR and the SMG. Only two soldiers could escape from the carnage. But then the panzer shot HE and killed half of them so I fell back with the last survivors.

So now I had only half crew of one Sherman ducking back behind their tank and surrounded by enemy infantry and tanks, and my NCO with two grunts taking cover behind the other burning Sherman. My only chance was to hold, hiding and waiting for the cavalry.

More panzers closing down.


Turn 10 and my section was completely surrounded by the Germans who have already taken the objective. I did not receive any reinforcements in the end to there was nothing I could do. German victory.


1/01/2021

The Big Hurt. Bring'em back alive. 01

"The Big Hurt (TBH) is a 2-part scenario book for NUTS! that takes place in the Hϋrtgen Forest in Germany from mid- September 1944 to February 1945.

MISSION 1 - BRING EM BACK ALIVE

September 17th, 1944 - Near Rotgen, Germany

SITUATION

The German main line of resistance is a few miles away, deep in the Hϋrtgen Forest. However, they still seem to have outposts and patrols far forwards of their fortified positions. While the Brits dally up north in the Low Countries, we Americans face the Hun on his own turf, the soil of Germany! You can bet he’ll be putting up a stiff fight for every inch of it too…

Earlier today we sent out several small patrols into the forest’s edge to the east of us. One of them was ambushed, and 4 out of the 6 men were killed. A wounded survivor returned a few minutes ago, and said that the Lieutenant leading the patrol was hit badly. As the survivor is a little guy, he had to hide the LT in a hollow tree at the bend of a creek. He then distracted the Jerry’s away from the spot. We’ve got to get the LT back, alive! Hopefully he’s still there."


So I created a full squad with an NCO Rep 5 Born Leader and Tough, Jr NCO Rep 5 Resilient, BAR and assistant Rep 5, grunt with rifle and grenade launcher Rep 5, three riflemen Rep 4 and four riflemen Rep 3. I deployed the squad split in two sections. One lead by the NCO with the BAR, 3 Rep 4 and 1 Rep 3 riflemen, and another lead by Jr. NCO, grunt with grenade launcher, 1 Rep 4 and 3 Rep 3 riflemen.


TURN 1. US 3 - G 5.

German did not activate and I moved my squad through the forest as fast as I could.


TURN 2. US 5 - G 2.

Germans received half squad as reinforcements from their border of the table. My squad reached the border of the forest and stopped there in the hope that a German PEF would activate and come out from the forest, but they didn't move.


TURN 3. US 4 - G6.

As German didn't activate, I decided to cross the firebreak and engage the first PEF, but it was a false alarm. Then I realized that the second PEF was now within line of sight (12") and it turned into half squad. I won the Reaction Test and killed the German NCO. The rest of the squad Ducked back but held fast. I kept the other half of my squad in reserve to give me firing cover when I moved back with the lieutenant, but that proved to be a fatal mistake.


TURN 4. US 5 - G 4.

All Germans were prone so one of my riflemen crossed the river and reached the wounded lieutenant. Then the German activated and popped up. In the shootout the BAR was wounded and one riflemen killed and only one German soldier was down. Both groups carried on. The German reinforcements (out of the picture) were closing fast.


TURN 5. US 1 - G 2.

Germans moved first and the reinforcement section arrived and wounded another man from my section, and also killed the soldier who crossed the river to rescue the lieutenant. Then, in my turn, I finally advanced with the rest of my squad but the Germans fought fiercely and managed to kill two men of the second section! Luckily, all my troops held their ground whereas the Germans couldn't take it and left the battlefield; so I could rescue the lieutenant and retrieve all of my wounded men. The price was too high for the life of just one man; I hope he deserves it.


3/28/2020

Stiff upper lip. Nuts! Blood upon the Risers

Afternoon, June 6th, 1944 - Sainte-Mère-Église, France

Situation
"Lieutenant Wray is coming back in from his solo recon. Looks like he single-handedly took out the commander of the 1st battalion of the German 1058th and threw them a bit of confusion. But that doesn't mean they still might not steamrolls us!

Objective  
To defend the northern end of Sainte-Mère-Église from German elements from 1058th and 709th static infantry division push past the American defenses, avoiding any German from exiting the south table edge for 12 turns.


View of the battlefield with the American troops already deployed in the town. The blue line is a sunken road flooded by the Germans to slow Allied advance.

Another view with the 57mm ATG saved from the previous mission, guarding the highway.

A different perspective with all Americans deployed and waiting. There are three scouts at the bottom left.

And one last view, this time with the .30 cal machine gun deployed in the second story and controlling all the battlefield, with a servant and a Rep 6 officer to help the gunner with both the activatiions and In Sight and Recover Tests.

Turn one and the scouts fast moving forward cross paths with Lt. Wray and his prisoners on their way back.

Germans are gunned down by the .30 cal as soon as they enter the table. They quickly move to both flanks to take cover in the houses.

Same situation from different angle. A scout section at the bottom, and an assault group running along the bocage to avoid being fired.

But that didn't help them and were caught by the machine gun and forced to duck back.

The Germans arrived to the "pause line" (waiting for HQ orders) bordering the sunken lane, where they must wait until they score 4+ in any activation (they waited for two turns). Lt. Wray spot them first, killing one and supressing the others (he's a marksman).

Then the scouts closed to the hedge, saw the enemy first, fired and put them all out of action. Good boys!

Meanwhile Lt. Wray kept moving back to his lines.

But the Germans finally deployed their two MG-42 on the second floor from both houses, and then a firing duel started.


 The green square marker represents they are on second floor.

The scouts decided to try to cross the sunken lane to clear the house in close combat with the MG team who was unprotected, but they were spotted midway and fell down in a deadly crossfire.

After that, the two German HMGs quickly finished the allied .30 cal MG

And then they did the same with the ATG as they killed one crew and made the other one flee the battlefield, abandoning the gun.

Now things were getting pretty hard for the 82nd as everytime they popped up their heads they were fired and suppressed by the German MGs.

This allowed the German soldiers to advance unmolested under the friendly covering fire. 
This picture belongs to turn 10. There were only two turns to end the encounter and no Germans had exited the board yet, though they were close.

When the German assault squad was crossing the town it was caught in an ambush. The point man was killed and two more run forward ducking for cover.

Then it was German turn and they fired and killed most opposition and could leave the board. It was turn 11.

Only two Germans were supressed in the last moment and one of them put out of fight and couldn't leave on turn 11, but in the last moment one recovered and picked up his wounded comrade and left the battlefield with him.

So the Germans finally exited more than 50% of the remaining American troops and won the scenario, capturing Sainte-Mère-Église and finishing here the whole campaign.

Well, it was shocking to be defeated after many easily won scenarios and also with both sides starting with the same number of troops; but that is how real life happens I guess.

Soon I will start playing a new campaign, probably Peiper at the gates, but first I need to get two cent coins to base my miniatures and I cannot find any because of the covid-19 quarantine!

On a side note, I wanted to comment that for this game I used the last edition of Nuts! which is a major improvement in all ways to the second edition I was using before. I recommend all players sticking to their older versions to buy the new one because of this.

3/24/2020

Mad Puppies. Nuts! Blood upon the risers campaign scenario.

Before sunrise, June 6th, 1944 - Merderet marsh, France.
Situation
"Oh man, I thought we were the only friendlies in the area. Damn glad to see you! We're with the 18th AAA. Watch out, there's Krauts everywhere!"
"Most of the other guys on this glider didn't make it. My gun commander took a patrol out to do a quick sweep around and see if he could find someone to link up with, but we heard shooting a bit ago, and I think they're done for. We've received a couple of pot shots ourselves, but neither of us has been hurt, so that's good."
"Ok, enough chitchat. You help us to get this jeep and gun out of the glider so we can get to San Mere and do some of what we came here for, and we'll let you ride is style!."
Objective
To extricate a jeep and tow a 57mm ATG from a crashed glider and get them to Sainte-Mere-Église in 12 turns.

I didn't have any aeroplane at home so I had to improvise. The two white dice on the top right and left down corners are German PEFs with Rep 4 and 1 respectively. My squad plus three more soldiers started six inches within the plane.

On the first turn the German PEF advanced and I resolved it. I score a 1 which meant nobody showed up, and as the other PEF was Rep 1 and it wasn't going anywhere, I decided to roll again. This time I got a full assault squad, but I was already in position waiting for them...

So in the In Sight all my troops reacted opening fire and killing almost all of them with the .30 cal MG and other automatic fire weapons.

It took me two turns to get the jeep out from the plane. I know, it's not a Willys! but I didn't have one and I was locked down at home due to the quarantine, so I had to improvise once again.

On turn three I moved forward until made contact with one of the surviving German soldiers who shot at me in reaction, but then I killed him when I returned fire. The other German was beyond six inches and as we both were in cover and it was night time, we couldn't see each other.

Then, the last German soldier move towards the enemy using cover, but he was shot down nonetheless in the In Sight by the officer with his colt. He is the parachutist who has killed more Germans during the campaign so far. I'm thinking about naming him Clint.


Turn four and all my troops are about to leave the area with the "jeep" and the ATG.

On turn five I scored a seven in the activation so some Germans appeared in the last moment.

They fast moved 16" and then they were shot in reaction. Their leader was killed and the rest retired. Game over.

This campaign is being too easy so far. I do hope things will get tougher in Sainte-Mere-Église. In any case, I'm upgrading my Nuts! second edition to the final one to see if AI gets more dangerous.


2/29/2020

Door to door. Nuts! Blood upon the Risers third scenario

Before sunrise, June 6th, 1944 - Fresville, France.
"Fresville? Damn, we are waaay too far north, smack in the middle of Jerryland".
"Still, maybe we should wipe out that Battalion HQ they told us about in the briefing before we head off..."
  
The objective in this mission is to search all buildings until I find and eliminate the command staff of the German 1058th Battalion, in less than 20 turns.
As I won the previous mission, there are no PEFs present on the table at the start of the game, but all buildings may contain German troops, and also some more may appear as reinforcements.

The first picture belongs to the second turn in which my paratroopers split in two squads, moving forward on both flanks, checking all the houses ASAP as well as looking for bundles in the field grass. The first house was empty.

The two following houses were also empty. I needed to score a 5+ on a D6 to find somebody in.

The fourth house was also empty, but two of my men found a bundle with some gammon grenades.

I kept them fast moving forward but all the houses were empty! I neither scored a seven in the activation dice so no enemy reinforcements could appear.

I looked in another field and found another bundle, but was as empty as all the houses in this damned village.

In the third field I finally found a .30 cal MG. Now I just needed to find some Jerries to shoot with it!

Turn six and still nothing. I was tempted to cheat myself and deploy some Germans, but I resisted.

On turn seven I had already checked all buildings except the last one, so I decided that the German HQ staff would be there. You can see in the picture below my three teams converging into it from three different points.

Finally! The Battalion staff, consisting of 3 officers Rep 5 with pistols, one officer Rep 4 with MP-40 and one NCO Rep 5 with MP-40.

In the following two activations Americans scored a six, so only the team in the centre with an officer Rep 6 with pistol, leading two paratroopers with M-1 Garand SA rifles, could activate.
Germans reacted and fired, but before ducking back all of them they could snap fire and kill the officer with SMG.

Two turns later, some paratroopers reached the two store house on the left and supported their comrades. In the exchange of fire one paratrooper with rifle and the German NCO with SMG died.

A second German officer went down by fire from the front house and the rest of the German ducked back, so my Star seeing the opportunity, moved from the right flank, reached the door and threw a hand grenade inside, but without effect. Then, the accompanying NCO with a Thompson entered and fired at the two surviving officers, putting them out of combat.

At the next turn all paratroopers could leave the table unmolested from two opposite exit points. The mission was successfully finished on turn 13. From all those 13 turns there was only one seven scored in the activations on each turn, which turned into German reinforcements, although no one came as they passed zero dice in the Enemy Activity Level roll, and after that scored a 2 in the reinforcement chart.

There could have been German soldiers in every house, and there could have been German reinforcements, even with tanks, a few times if the dice gods would have wanted. I expected a very hard mission to accomplish but in the end it turned into another walk in the park.

BTW, I forgot to roll three times in the American reinforcement chart for extra paratroopers at the beginning of the mission, so I played with fewer soldiers that I was supposed to.